Dealing with a leak, overflow, or flooded room? This big, plain-English guide shows you exactly how to stop the water, dry your home fast, prevent mold, and restore finishes plus what tools you’ll need and when to call a pro. For 24/7 help or a free phone consult, call +1 604-800-3900.
Safety First
- Electricity: If water is near outlets/appliances, switch off breakers to affected areas before entering.
- PPE: Wear gloves, rubber boots, and an N95/respirator especially if the source is unknown or grey/black water.
- Ceilings: Stay clear of bulging ceilings; they can collapse. Pierce only after power is off and a container is ready.
- Children & pets: Keep them out of the work zone.
Stop the Water at the Source
- Shut off supply: Close the main valve (usually near the water meter) or the fixture valve (toilets, sinks, hot-water tank).
- Roof/Storm leaks: Cover with a tarp temporarily, reconnect downspout extensions, clear exterior drains.
- Sewer backup: Treat as contaminated; avoid contact and call a pro immediately.
Know Your Water & Damage Levels
Water categories (by contamination)
- Category 1 (Clean): Supply lines, rain through intact roof. Lower risk.
- Category 2 (Grey): Dishwasher, washing machine, aquariums. Contains soils/chemicals.
- Category 3 (Black): Sewage, river/groundwater, long-standing water. High risk professional remediation required.
Extent (how wet, how far)
- Light: Surface wetting, minimal wicking into walls.
- Moderate: Carpets/pads saturated; drywall wicked up 5–30 cm (2–12").
- Heavy/Widespread: Multiple rooms, ceilings, insulation, subfloors saturated.
Step-by-Step Timeline (0–7 Days)
First 60 minutes
- Kill the power to affected circuits, stop the leak, and move valuables to a dry area.
- Extract standing water: wet/dry vac, squeegee, or pump.
- Pull baseboards gently; this lets wall cavities breathe.
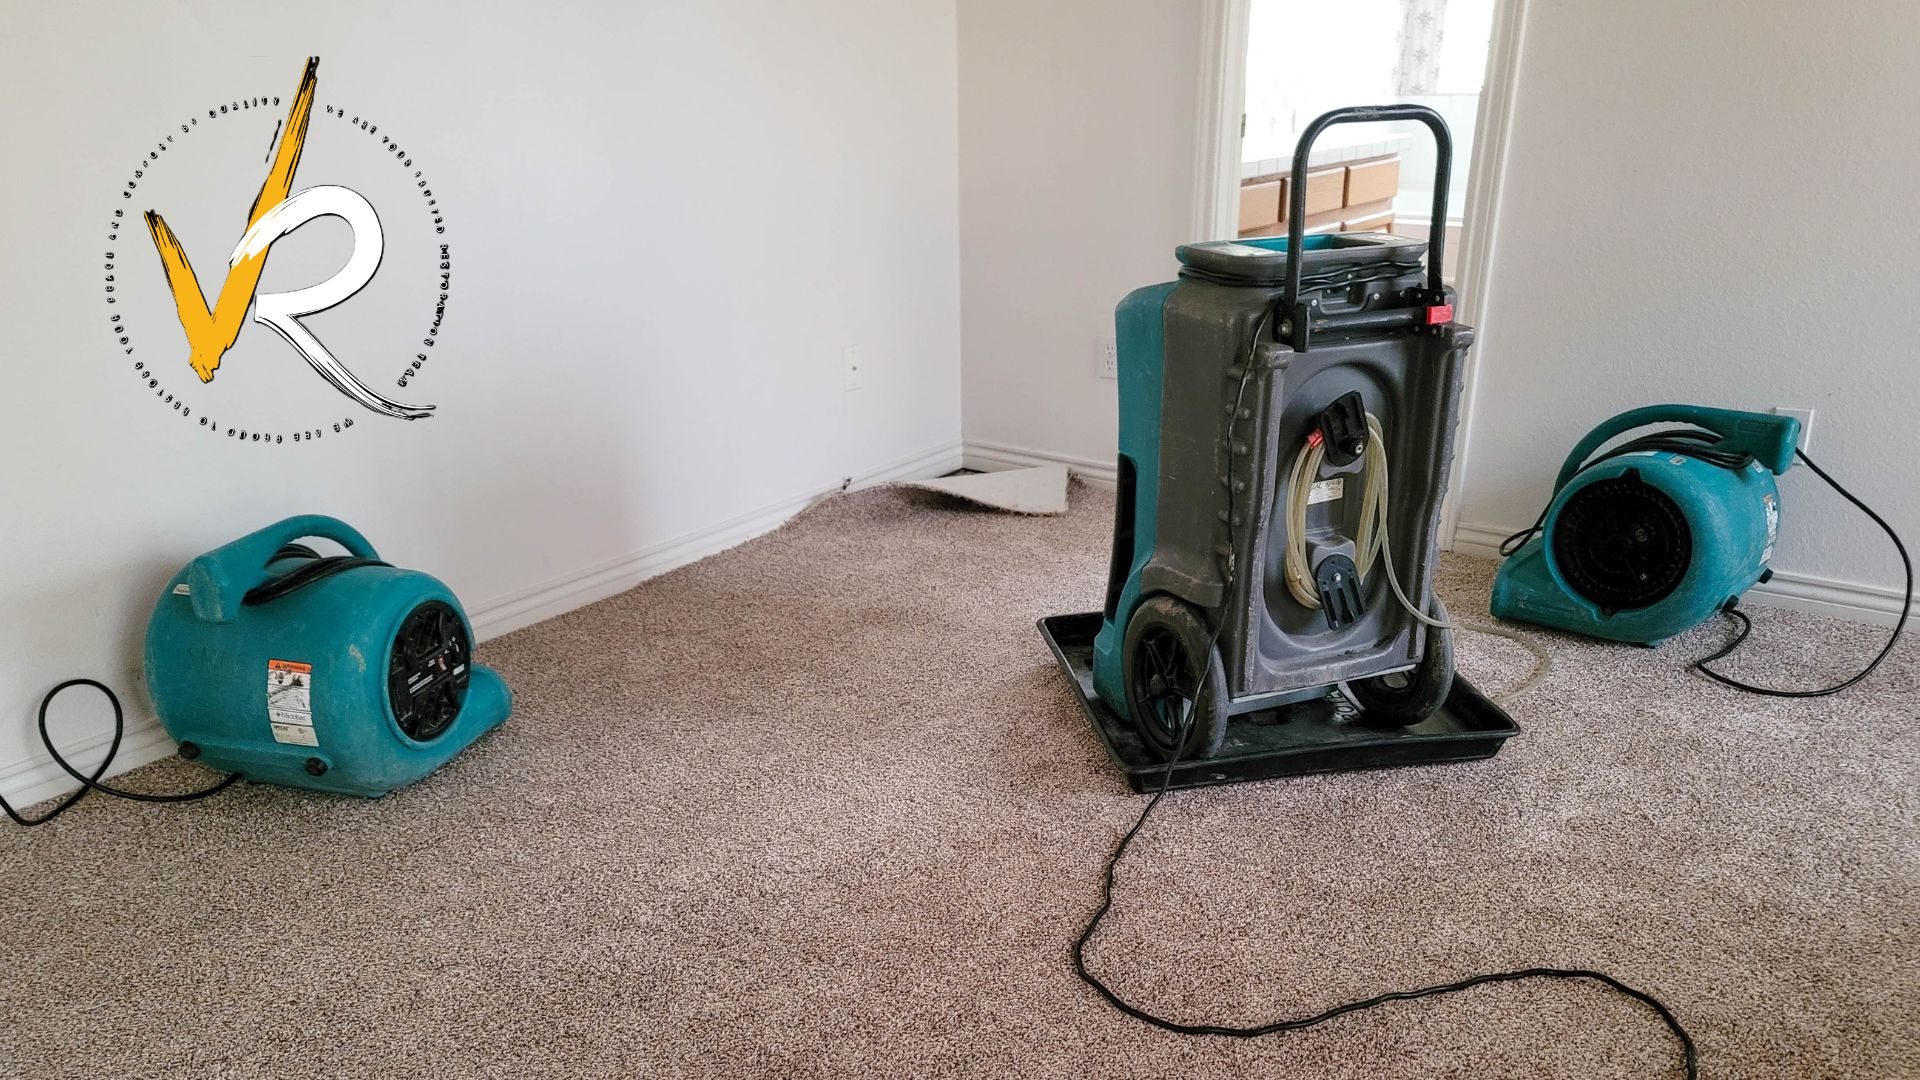
- Start air movement (fans/air movers) and a dehumidifier ASAP.
Hours 1–24
- Remove and discard saturated pads (carpet pads act like sponges).
- Open cavities: if drywall is wet at the base, score and remove 5–30 cm (2–12") to create a “flood cut.”
- Set containment (plastic sheeting) if any area smells musty or if water is Category 2/3.
- Clean and apply antimicrobial to hard surfaces after extraction.
Day 2–3
- Run air movers 24/7, position to create circular airflow across surfaces.
- Dehumidify continuously; empty reservoirs or plumb to drain.
- Measure moisture twice daily; adjust equipment until readings trend down.
Day 4–7
- When materials reach target moisture (see below), remove equipment.
- Re-install insulation/drywall, mud/tape, prime, and paint.
- Replace baseboards/flooring as needed. Consider upgraded water-resistant materials in wet-prone zones.
Mold clock: Microbial growth can start within 24–48 hours. Prompt extraction and dehumidification are critical. If an area smells earthy/musty or growth is visible, pause rebuild and address it before closing walls. For help, call +1 604-800-3900 or see Mold Remediation.
Tools & Materials You’ll Need
Here’s a practical table of the gear most homeowners use during water-damage cleanup. Quantities depend on room size and how wet things are.
| Item | What It Does | How to Use | Pro Tips |
|---|---|---|---|
| Wet/Dry Vacuum | Removes standing water quickly | Vacuum puddles, empty tank frequently | Use a squeegee attachment on smooth floors |
| Submersible Pump | Pumps out deep water | Place at lowest point, route hose outdoors | Check hose slope; avoid kinks |
| Air Movers / High-Velocity Fans | Speeds evaporation at surfaces | Aim along walls, not at them; create circular airflow | Plan ~1 unit per 100–150 sq ft plus hallways |
| Dehumidifier (L or pint/day) | Pulls moisture from air to finish drying | Run continuously, keep doors/windows closed | Drain to sink/floor drain to avoid overflow |
| Moisture Meter | Measures moisture in drywall/wood | Check the wettest area and compare to “dry” rooms | Log readings daily to track progress |
| Hygrometer | Reads room humidity | Keep RH under ~50% during drying | Place away from direct airflow |
| Utility Knife & Pry Bar | Removes baseboards, cuts flood-cuts | Score bead of caulk first, pry gently | Label trim for easy re-install |
| 6-mil Poly Sheeting & Tape | Builds containment; protects items | Seal doorways to control dust and spores | Add a zipper door for easy access |
| Antimicrobial Cleaner | Disinfects hard surfaces after extraction | Apply, dwell per label, wipe dry | Never mix bleach with ammonia products |
| HEPA Vacuum / Air Scrubber | Captures fine particles and spores | Run during demolition/cleanup | Use true HEPA filters (sealed units) |
| Fans & Space Heaters (with care) | Supplement drying in cool rooms | Keep safe clearance; avoid closed, unvented flame heaters | Do not overheat; warm + dry air is best |
| PPE (Gloves, Boots, N95/Respirator, Goggles) | Protects you during cleanup | Wear for extraction, demolition, and chemicals | Upgrade to full respirator for Category 3 |
Drying Targets & Verification
- Relative Humidity (RH): Aim for under ~50% in the affected rooms.
- Wood framing/subfloors: Target ~12–16% moisture content or equal to unaffected areas.
- Drywall: Should test “dry” compared with an undamaged area before closing walls.
- Odour & visual: No musty smell; no visible staining/dampness.
Don’t rush rebuild. Trapped moisture = future mold or finish failure.
DIY vs. Pro When to Call VR Plus Restoration
- Call now if water is contaminated (sewage/groundwater), ceilings are sagging, multiple rooms are saturated, or sensitive occupants are present.
- DIY may be fine for small, clean leaks caught early (e.g., supply-line drip) in a single room.
- Time matters: If you can’t extract and start dehumidification within 24 hours, call us.
We provide 24/7 extraction, structural drying, mold remediation, and full repairs across Metro Vancouver and BC. Free advice & estimates: +1 604-800-3900.
Insurance & Documentation
- Take photos/videos of the source and all damaged areas.
- Save receipts for equipment, materials, and emergency work.
- Log readings (humidity, moisture) daily during drying.
- Report promptly if the loss may be covered (sudden/accidental events).
- We help with scopes, moisture logs, and communication to streamline the claim.
Frequently Asked Questions
- How long does drying take?
- Small clean-water leaks can dry in 24–72 hours with the right equipment. Larger losses or cold, damp rooms may take 3–7 days or more.
- Can fans alone fix water damage?
- Fans help, but without dehumidification you may just move humid air around. Combine high-velocity air movement with dehumidifiers.
- Do I have to remove baseboards and cut drywall?
- Often yes. Baseboards trap moisture; flood cuts let cavities dry quickly and prevent mold.
- Can laminate or hardwood be saved?
- It depends on time, saturation level, and construction. Engineered wood fares better than solid hardwood; laminate usually fails when swollen.
- When does mold start?
- Growth can begin within 24–48 hours in warm, moist conditions. If you smell mustiness or see spots, address it before closing walls.
Leave a Reply